All the focus might be on the 14th of March and the Galaxy S IV right now, but if the enduring success of the Galaxy S II is anything to go by, Sammy’s current flagship is here for the long haul. Given that, we thought we’d take a little trip down rooting lane, to find the very best way to squeeze the best performance out of the Galaxy S III.
Like any other Android handset, we’re firmly of the opinion that you’ve gotta root your handset if you want to get the very best performance outta it. But, with the Galaxy S III, we’re going a step further: we’re stripping away Samsung’s proprietary TouchWiz skin and whacking a custom version of Android on there, and then adding a few more tweaks to round things out.
As always, rooting is at your own risk, and will most likely void your warranty. If you do need to send it back to the factory, make sure you restore stock software first. We’ve tried and verified all the methods below, but computers can be fickle beasties so it’s possible, if very unlikely, that you might brick your device.
Step 1: Backup
Since you’ve likely had your Galaxy S III for a while now, there’s a decent chance that you’ve got assorted Instagram photos/a well-curated porn collection you want to preserve for posterity. That’s all fine — we’re going to use Carbon Backup to save all your dirty sexts precious memories.
- Download Carbon Backup to your Android device.
- While that’s happening, download the desktop client from here
- Connect the phone to the computer, and help them perform the special Carbon mating ritual that will enable Carbon backup — it’ll hold your hand throughout the whole procedure, don’t worry.

- Select all apps, and create a backup using Carbon. You can either back up to the cloud (but you’ll need the paid-for Carbon Premium to restore from the cloud), or create a backup to an SD card or your computer.
Step 2: Let’s Get Rooty
Download the Galaxy S3 Root Toolkit from here. Remember a silent prayer of thanks to mskip, the dev behind it.
- Follow the instructions, installing the Root Toolkit to a root file on your PC.
- Run the program (no need to ask to check for an update). Select your model when prompted — you can find it in Settings–>About device–>Model number (and Android version right underneath).
- Scenes closely resembling The Matrix will play out while the Root ToolKit downloads all the necessary stuff. Eventually, you’ll get to the screen seen above. Unplug your device, and select number one (and number one again, when it asks you to confirm).
- The drivers will now install (it’ll take a moment) — you’ll have to click through a couple of pages on a normal Windows installer. When you get the “Connect your device via the usb cable…etc” message, do what it says and connect it.
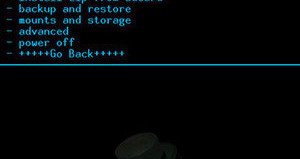
- Go back to the main menu. You want option 2 (root options), and then option 3 (ALLINONE). You want to flash option one (CWRecovery) and then option 2 for superuser.
- Check that you’ve got USB debugging enabled (you should do). Type yes to start rooting.
- Something called ‘Odin’ will open. Follow the instructions on-screen in the Root Toolkit, which will load the recovery image. Your phone will reboot, and you can close Odin.
- The Toolkit will do a few more things, and then congrats, you’re rooted!
Step 3: Flash CM and Rid the World of TouchWiz
Samsung phones come pre-loaded with TouchWiz, which, if Reddit is to be believed, is “worse than Hitler”. I wouldn’t quite go that far, but the normal Android interface is certainly better. To get that, we’re going to install one of the most popular custom ROMs, CyanogenMod.
- On your phone, download ROM Manager from the Play Store.
- Open it, grant root access, and it the very top option, Recovery Setup. Follow the instructions to flash ClockworkMod Recovery.
- Download the CyanogenMod version that we want from here. Copy the .zip onto your device, preferably somewhere you’ll remember like download.

- Go into the ROM Manager, and select “Install ROM from SD Card”. Select the CM 10.1 file that you copied over to your device earlier, tick Backup Existing ROM and Wipe Data and Cache, and then hit reboot and install.
- Once it’s done, you should see the CyanogenMod boot screen.
Step 4: Restoring BackUps
- Custom ROMs like CyanogenMod don’t come with Google Apps like Play Store and GMail by default, so we have to re-download them. You can download the actual apps from here.
- While it’s downloading, you need to enable USB debugging again. Go to “Settings –> About –> Build number”, and tap “build number” about ten times, until you get a little message saying “you’re now a developer”. Head back into settings, go to “Developer Mode”, and turn on USB debugging.
- Once you have the download, copy the .zip onto your SIII. Power down your device, and boot it up into the bootloader (hold down power, home and volume up buttons at the same time). Select “Recovery”; then, install zip from SD card. Navigate to the Google apps zip you just copied over, and hit go. Once the install is complete, reboot.
- Once you’ve got past the initial setup, download Carbon backup from the Play Store again, set it up (again), and restore from your backup.
Step 5: Pimp That Galaxy
Congratulations! You’re now running a custom build of Android, so you’ve got far more options at your disposal now. Some changes to be made will be a matter of personal taste (like the design of your homescreen); others are more technical tweaks, which are the ones we’re going to cover here.
- You’ve now got access to a new menu, right down the bottom of settings: “Performance”. There’s one change I would recommend you make to get better performance out of your Galaxy SIII. Go into “Performance–>Memory management”, and tick the “allow purging of assets” box. This will effectively increase the amount of memory available, making hardcore multitasking a lot easier.
- Go to “Settings–>System–>Notification drawer”, and enable the Power widget. This’ll give you all sorts of handy toggles (customisable in the “Widget Buttons” menu) in the notification drawer. In the same System menu, there’s also a “Status bar” menu, which gives you the option to change the battery icon to a percentage.
- Download Tasker from the Play Store. Tasker’s a wonderfully neat app that you can program to do just about anything. For some neat ideas and walk-throughs, have a look at this thread on XDA forums, which explains everything pretty well. There are even more ideas on this Lifehacker article.
- Set up profiles. Something that’s missing from pretty much every mobile OS nowadays (but was a staple back in the days of Symbian), profiles are basically presets of a bunch of settings, like ring volume, Wi-Fi on/off, etc. I’ve got one for work, one for home and one for silent, for example. You can quick-change profiles by holding down the power button.
- Download Apex launcher and get to work on your home screen. The stock Android screen is just, well, boring. Apex launcher (or the equally good Nova) provide endless options for customising your homescreen. If you need inspiration, check out Mycolourscreen.
- Download Light Manager to manage the notification LED. My advice is to set the LED to colours that match the app (so blue for Facebook, red for Gmail etc), but it’s your choice.
- AdFree works like an ad-blocking extension in a browser. Simples.
Those are my standard recommendations — but of course, there’s basically limitless possibilities for what you can do with your device now. Not to mention, you should also see better battery life, more frequent updates and a less of that TouchWiz hell.
Have we missed anything out? Let us know in the comments below!
Source :


.jpg)